Posts

Showing posts from July, 2022

Sea Anchor, Painting the Bilge

 From "Tinkerbelle" by Robert Manry.  When three wind rose to near gale levels,  a sea anchor was deployed from the bow.   150' of 1/2" nylon warp attached to" an old army canvas bucket". A lighter line was attached to the bucket,  15' in length,  attached to a buoy to add the bucket sinking too far.   The rudder was also removed.   With this set,  Tinkerbelle drifted slowly downwind,  advising breaking waves, and  with a relatively steady motion.  ÷    =     /    ×     +      € I read online that sealing the bilges of wooden boats was best done with grey metal primer that contained "flakes of metal". Okay. Well three things; I couldn't ascertain whether Kill Rust Aluminium - No Primer Required actually contained aluminium  flakes (but it did have Titanium Dioxide?), "Jacaranda's" bilge had already been sealed,  mostly with varnish,  ...

Trailer Winch, Gun'l Varnishing

Image
  Gratuitous alpaca photo.  This is my oldest and only surviving 'paca named Kerry . It's an Australian joke.   So today,  after chopping wood,  and riding my bike I fitted a new (recycled from my Mirror dinghy trailer), hand winch.  Yesterday I removed an electric contraption that George made and probably only he knew how to use. I think it needed a charged truck battery to operate,  so way too complex for me.  I then sanded and garnished the gun'ls and transom.  Looking good.  

Refit Hull & Trailer

Image
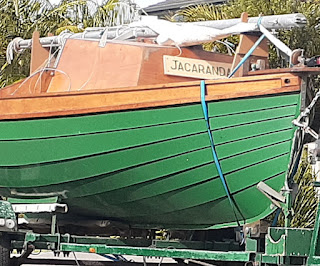
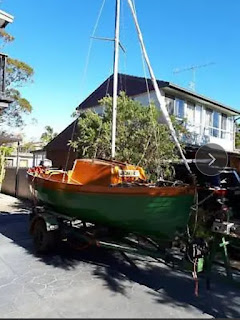
 HULL REFIT: Prep - scraped & sanded any lose paint.  Noted keel was bare of paint.   Primed - with oil based wood primer sealed the keel,  now fittings & every plank seam.   Next: Scuff sand hull. Apply single pack green polyurethane paint.   TRAILER REFIT:  Descaled - relieved to discover no major weaknesses in the structure.   Primed - with epoxy.  Painted - ALDI brand green paint applied all over.   Next - straighten bracket on left mudguard.  Remove old lights & bolts. Mount hand winch.  

Up Goes The Stick

Image
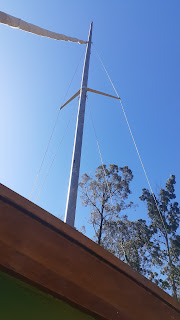
  Today I used a break in the winds to remove the steel frame over the dinghy,  lest it fall and cause damage.   While she was free of encumberances I set the newly re-rivetted is place& raised it.  The headsail on furler curlers a structural member,  the halyard has a three part purchase to the sail & with shrouds attached,  may base in place & from there is a very easy lifty-pully manoeuvre to stand the mast. It's comically small really,  but obviously sufficient to send Jaca across the sea.   Yesterday's vanishing is looking great, though no new layers were added.   Stoked!

Success

Image
 The Willyweather Report this morning says "Temp: 8.4°C Feels Like 0.5°C". The wind has been howling all night and is still doing it.  There is a "Dangerous Surf Warning" posted, and although it would previously have made me grab my board and go surfing,  these days it's just a no offshore sailing day .... even if my boat was ready.   As it's mid winter here I am getting plenty off reading done.  I've just finished "The Sea Was Kind"; a WW2 era escape under sail from the Japanese. A good read about sailing under duress,  lack of food and equipment,  fear of being beheaded by the Japanese or Moro-Philippines crew.  I've also just begin rereading "Tinkerbelle"; Robert Manry's solo transAtlantic sail in a 13' converted open dinghy. I must have previously read this with candy coloured glasses because I'd read that a newspaper editor bought a dinghy,  put a cabin on it and sailed across an ocean.  Even as I write this it se...

Damp Day, Dowelling Old Screw Holes

Image
  Oh it's a foggy morning just now.  I've bought some lengths of doweling to plus old screw holes,  but with such damp air drilling and glueing quality will be compromised.  The wood will tear and the epoxy may go milky. Hope it fines up.   I could bring the mast to the house and replace all the rivets.    By Winslow Homer,  of human resilience.  Shamed by whinging about a bit of fog,  while studying the painting above,  I got to work.   Mast: drilled out rivets and refitted stainless steel rivets. Hull: drilled out old headsail track screw holes to accept 5mm dowel and epoxy glued this in.  Same procedure followed fort various old holes in the transom as well as two sets of pintles that I removed.  Once the epoxy is dry,  the dowels wil be cut down and sanded flush,  then oiled and varnished.  A good day. 

Cuddy Stay or Cuddy Go?

Image
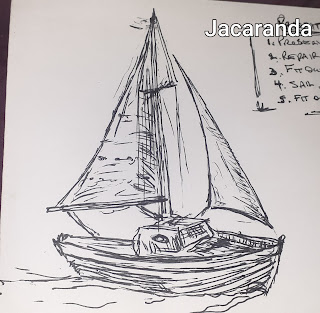
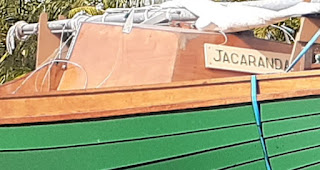
  When first I laid eyes on the Jacaranda her boxy cùddy cabin made me wince. That amount of we windage would surely not be tolerated? But, then I thought of the benefits of having a space of relative comfort in a blow.  Somewhere to go,  somewhere to store.  Very practical in a double-decker way. Perhaps it may stay?

Learning Wooden Boat Skills

Image
  As a mostly fiberglass boats sailor, buying a serious timber boat called for some re-education. I've been studying this book:  It is mostly Scandi', written in 2011 and based on traditional timber boat building methods.   The author makes it very clear,  that sealing wood to prevent freshwater ingress and careful air circulation,, are paramount.  After constructing a soft shelter, I checked for any problem areas. I didn't have to look far,  a headsail fairlead track with no less that eight screws ie: holes, per side.  These were removed and linseed oil dribbled into the cavities.  Later,  these will be drilled and plugged.  Several bollards were a bit thin on varnish and their fixing bolts looked like they had cracked through normal expansion and contraction.  These were dowsed in linseed oil.  They will be wiped dry,  lightly sanded and given several coats of thinned varnish.   The little bowsprit showed ...

Wooden Boat Association

Image
  Jacaranda's wooden build is emerging as something of significance greater than I had considered.   During my first quiet familiarization session I worried over the cùddy cabin.  So many joins,  shady corners and areas of the hull interior that were inaccessible.  While I would enjoy having somewhere dry to store gear, the hidden corners seemed to haunt me.     I was already considering removing the cuddy cabin because it looks a bit ugly.  So last night I e-mailed they local chapter of the Wooden Boat Association to ask if they could offer guidance on how I might get this job done. Obviously attacking the structure with a saw would be simple,  my concerns relate to the need to reinforce the remaining hull,  especially the mast base which would then be hull mounted   I was delighted to get a response from the secretary within 48 hours offering assistance.  

Freshwater & Wood

Image
   "The Big Book of Wooden Boat Restoration " by Thomas Larrs:- Fresh water,  or water from above is the greatest enemy of wooden boats. Water may be prevented from building up or drained via a plug in the bilge.  Efforts must be made to stop fresh water entering by separate canopy,  deck cover allowing air circulation etc.  Water can enter the structure close by joints and fittings; these should be adequately sealed. The bilge must be keep clean and ventilated to prevent growth of mold or fungi.  The bilge must be kept varnished or painted.    Varnish ages and cracks and must be replied annually.  Sunlight can split varnish,  allowing moisture which can heat causing steam which further cracks or splits varnish and timber.   Keep varnish from direct sunlight as possible to limit aging the varnish, and then  expansion and contraction which compromises the seal.  

Dinghy Life

Image
 Almost nightly I seem to be watching Roger Barnes'  dinghy cruising videos on utube. Very good they are too, inspiring even.   What I was not fully aware of was how seriously Roger follows traditional sailors' ways; tarring the bilge boards,  linseed oiling the rigging,  wooden blocks,  splicing various sheets & warps,  seizing eyes & so on.  I am drawn to him for this,  he is seriously intelligent & can articulate ways in which dinghy cruising is a most enjoyable activity. Roger is clearly wedded to the simple pleasures & out spending peacefully hours hard pressed in nature.  This evening,  confined to barracks by Covid restrictions,  Roger did a short treasure on art in life.  He closed with a plea for his followers to take time to imbue you're life with creativity & to get off the bandwagon of ujmediocrity (my words), that goes hand in hand with mass consumerism.   Beautiful.  ...

I Buy a Clinker Dinghy

Image
  I don't know how many boats I've had but I did tell a little white lie today: "I never saw a boat I didn't love". Pig course I have,  but mostly I can find something lovely about each sail boat because like dogs and teddy bears, they " don't answer back, & they don't tell you that you look fat ".  Anyway, after lurking for a few weeks, I went to inspect a 15 ft. timber clinker dinghy in pea green & varnish. I had bugger all money for such a thing,  but I hoped to offload a bike to help me out should I decide to go ahead with the purchase. In my mind I  knew that a half-century old dinghy was likely to have issues. So I harboured,  some misgivings & there was the rusted out trailer to throw into the deal. I could barely afford the boat let alone a basket case in need of rescuing.   As I went through the gate and saw a gleaming pea green clinker hull before me, all my objectivity melted into the concrete.  I had to have this boat!...

Avel Dro

Image
  From Roger Barnes' video,  some ways of running his boat are worth noting: Stockholm Tar is used to seal bottom boards.  Transom is notched for admiadmittingtting the sculling  oar. Soft shackles are used.  Tiller taming device used by DCA, features a fixed line between attachments on each quarter. A bite on this line is fed rewards through a metal ring just back from the handle of the . A line with bungee cord attached is hooked through the bite. The other end runs through a clan cleat to adjust tension for heavier winds.  It offers brief self steeruing, some relief to the helmsman.  Auto electric bilge pump. Battery is removed for charging after east sail  Waterproof bags are used for dry storage.  These  lashed under the seats,  act as flotation.